TIL: making the network ports blink
With the following ethtool command you can make an individual network port blink.
Can come in handy with the ever changing interface naming conventions of newer Linux distributions.
ethtool -p <interfacename>
With the following ethtool command you can make an individual network port blink.
Can come in handy with the ever changing interface naming conventions of newer Linux distributions.
ethtool -p <interfacename>
Recently I needed to extend/increase a LVM partition to give it more space:
In some rare cases you might need to copy a file from a VM in Qubes OS to Dom0.
This can be done with the following command in a Dom0 console:
qvm-run --pass-io my-vm 'cat /path/to/file/in/my-vm/file.doc' > /path/fo/file/in/dom0/file.doc
I made some config changes to the .screenrc and wanted to directly apply them to the running Screen without restarting.
Turns out one can trigger a reload of the config inside a running Screen session:
CTRL+a :source ~/.screenrc
Had to work with some machine generated XML files.
To make them more readable, I looked for a way to format and indent them in Vim.
There are many tools for this, I stumbled upon xmllint which also validates the XML.
This can be useful, but restricts it to formatting valid XML files only.
:%!xmllint --format %
A long time ago I learned about the gf command in Vim.
It goes to the file whose name is under the cursor.
This can be pretty handy if you have a bunch of Markdown files that reference each-other.
But I never knew to go back to the previous file again.
So this week I took the time to find out how to do it.
And it turns out that there are multiple ways :-)
The most straightforward one is: CTRL-6
And there is also CTRL-o (back to the 'outer' file) with its companion CTRL-i (go forward to the 'inner' file).
CTRL-o and CTRL-i can be used to jump back and forth on the list of files opened via gf.
Today I got greeted by the following error when I was trying to scp some file.
# scp a.txt user@somehost:/tmp/b.txt
subsystem request failed on channel 0
scp: Connection closed
This cryptic error message comes from a default config change that OpenSSH introduced in version 9.
By default it now uses the sftp protocol for transfering files and no longer the original scp protocol.
Thus for hosts which do not support the sftp subsystem, but only the original scp, the file transfer fails with the above error.
Luckily there is the -O parameter which can be used to select the original scp protocol, and the transfer then succeeds:
# scp -O a.txt user@somehost:/tmp/b.txt
3 shell scripts: Kill weasel words, avoid the passive, eliminate duplicates
In particular, I've created shell scripts for catching three problems:
- abuse of the passive voice,
- weasel words, and
- lexical illusions.
Found some unexpected TCP socket listening on port 5355.
The corresponding process was systemd-resolved.
Turns out this is the LLMNR implementation for name resolution on the local network, which is enabled by default.
As this is not useful on a server (and rather another attack vector to keep an eye on), I decided to turn it off.
This can be done by adding LLMNR=no to /etc/systemd/resolved.conf and then doing a service systemd-resolved restart.
(via)
Today I found myself on a Linux machine and needed to check which processes are listening for network packets.
Usually I use netstat for such tasks, but on this machine it was not available.
Luckily there was ss available, and the following command gave me the processes listening for TCP packets:
ss -n -A tcp -a -p state listening
Evolution stores passwords for email accounts in the GNOME Keyring. Thus they can be listed there for example with Seahorse.
Can very much relate to this ⌨️
Dropping :wq and j's and k's in all my word, google, txt docs.
(via)
After upgrading one of my physical hosts to Debian Trixie, it failed to boot.
It complained about the service for mounting my encrypted disk not starting.
Turns out this is a known problem (even mentioned in the Trixie release notes).
For cryptsetup to work in Debian 13, the systemd-cryptsetup package must be installed:
# apt-get install systemd-cryptsetup
After doing this (via the rescue shell) and rebooting the host, the system started seamlessly.
And the encrypted disks were mounted as expected.
and TIL I can read(1) from a distinct file descriptor to avoid having processes in the shell's while loop consume input from the file I pass.
while read -u 8 f; do
...
done 8</path/to/fileI can use any fd (typically > 2)
(via)
On a work computer I'm currently using WSL quite often and thus wanted to see if there is a pbcopy/pbpaste equivalent.
Turns out WSL integrates with the X11 and Wayland clipboard APIs, thus we can simply install wl-clipboard.
With this in place, running wl-paste inside WSL dumps the content of the Windows clipboard.
And echo "foobar" | wl-copy puts "foobar" into the Windows clipboard.
Debian 13 (Trixie) was released yesterday. 🎉
As I refer to the stable repositories in my sources list, the following error is now shown since their release information changed:
# apt-get update
Hit:1 https://security.debian.org/debian-security bookworm-security InRelease
Hit:2 https://download.docker.com/linux/debian bookworm InRelease
Get:3 http://mirror.iway.ch/debian stable InRelease [138 kB]
Get:4 http://mirror.iway.ch/debian stable-updates InRelease [47.1 kB]
Hit:5 https://deb.goaccess.io bookworm InRelease
Reading package lists... Done
N: Repository 'http://mirror.iway.ch/debian stable InRelease' changed its 'Version' value from '12.11' to '13.0'
E: Repository 'http://mirror.iway.ch/debian stable InRelease' changed its 'Codename' value from 'bookworm' to 'trixie'
N: This must be accepted explicitly before updates for this repository can be applied. See apt-secure(8) manpage for details.
N: Repository 'http://mirror.iway.ch/debian stable-updates InRelease' changed its 'Version' value from '12-updates' to '13-updates'
E: Repository 'http://mirror.iway.ch/debian stable-updates InRelease' changed its 'Codename' value from 'bookworm-updates' to 'trixie-updates'
N: This must be accepted explicitly before updates for this repository can be applied. See apt-secure(8) manpage for details.
To fix this message (and enable upgrading to the new release!), I use the following command:
# apt-get --allow-releaseinfo-change update
...
N: Repository 'http://mirror.iway.ch/debian stable InRelease' changed its 'Version' value from '12.11' to '13.0'
N: Repository 'http://mirror.iway.ch/debian stable InRelease' changed its 'Codename' value from 'bookworm' to 'trixie'
N: Repository 'http://mirror.iway.ch/debian stable-updates InRelease' changed its 'Version' value from '12-updates' to '13-updates'
N: Repository 'http://mirror.iway.ch/debian stable-updates InRelease' changed its 'Codename' value from 'bookworm-updates' to 'trixie-updates'
Afterwards I run the usual apt-get dist-upgrade to upgrade the system to the new Debian version.
In the tmux and gist and trying to make students happier article, Jan-Piet Mens explains how to take screenshots with tmux.
As I still haven't migrated from Screen to tmux, I was wondering if this is also possible in Screen.
And turns out that there is indeed a similar mechanism that can be used in Screen.
By using the hardcopy command, Screen can write the current scrollback buffer to a file.
This can also be done for a detached session:
screen -X hardcopy -h /tmp/myscreenshot.txt
It's also possible to specify an explicit session and pane to use:
screen -p 0 -S 12345.pts-0.rocky -X hardcopy -h /tmp/myscreenshot.txt
Turns out docker only restarts unhealthy containers when running in a Docker Swarm setup.
For other setups, the following crontab entry provides a quick and dirty alternative that checks for unhealthy containers and restarts them.
*/15 * * * * /usr/bin/docker ps -q -f health=unhealthy | /usr/bin/xargs --no-run-if-empty -L 1 /usr/bin/docker restart
By providing the --since parameter, we can list the past docker events:
docker events --since=60m
This can be further combined with --filter parameters to drill down to specific events of a specific container:
docker events --filter event=restart --since=24h --filter container=<containername>
Here comes a handy utility:
timeout. As the name suggests, this command adds a timeout to other commands. You specify the time limit you want to wait for a command and if that time passes,timeoutsends a signal to terminate it and exits with non-zero. By default,timeoutsendsSIGTERM, but you can change it with the--signalflag, e.g.timeout --signal=SIGKILL 1s foo.For example,
timeout 1s sleep 5will send theSIGTERMsignal tosleepafter 1 second.
(via)
Tmux - the essentials is a concise article by David Winter giving a gentle introduction to the tmux terminal multiplexer.
tmuxcreate a new tmux sessiontmux lslist any existing tmux sessionstmux areattach to the last open tmux sessionctrl+bthe default tmux command prefixprefix+ddetach from current tmux sessionprefix+ccreate a new windowprefix+0-9to switch to the numbered windowprefix+,rename the existing windowprefix+%split the current pane into two vertical panes, left and rightprefix+"split the current pane into two horizontal panes, top and bottomprefix+qview numbered panes for current windowprefix+q,0-9switch to pane immediately after displaying pane numbersprefix+zto zoom and unzoom
(via)
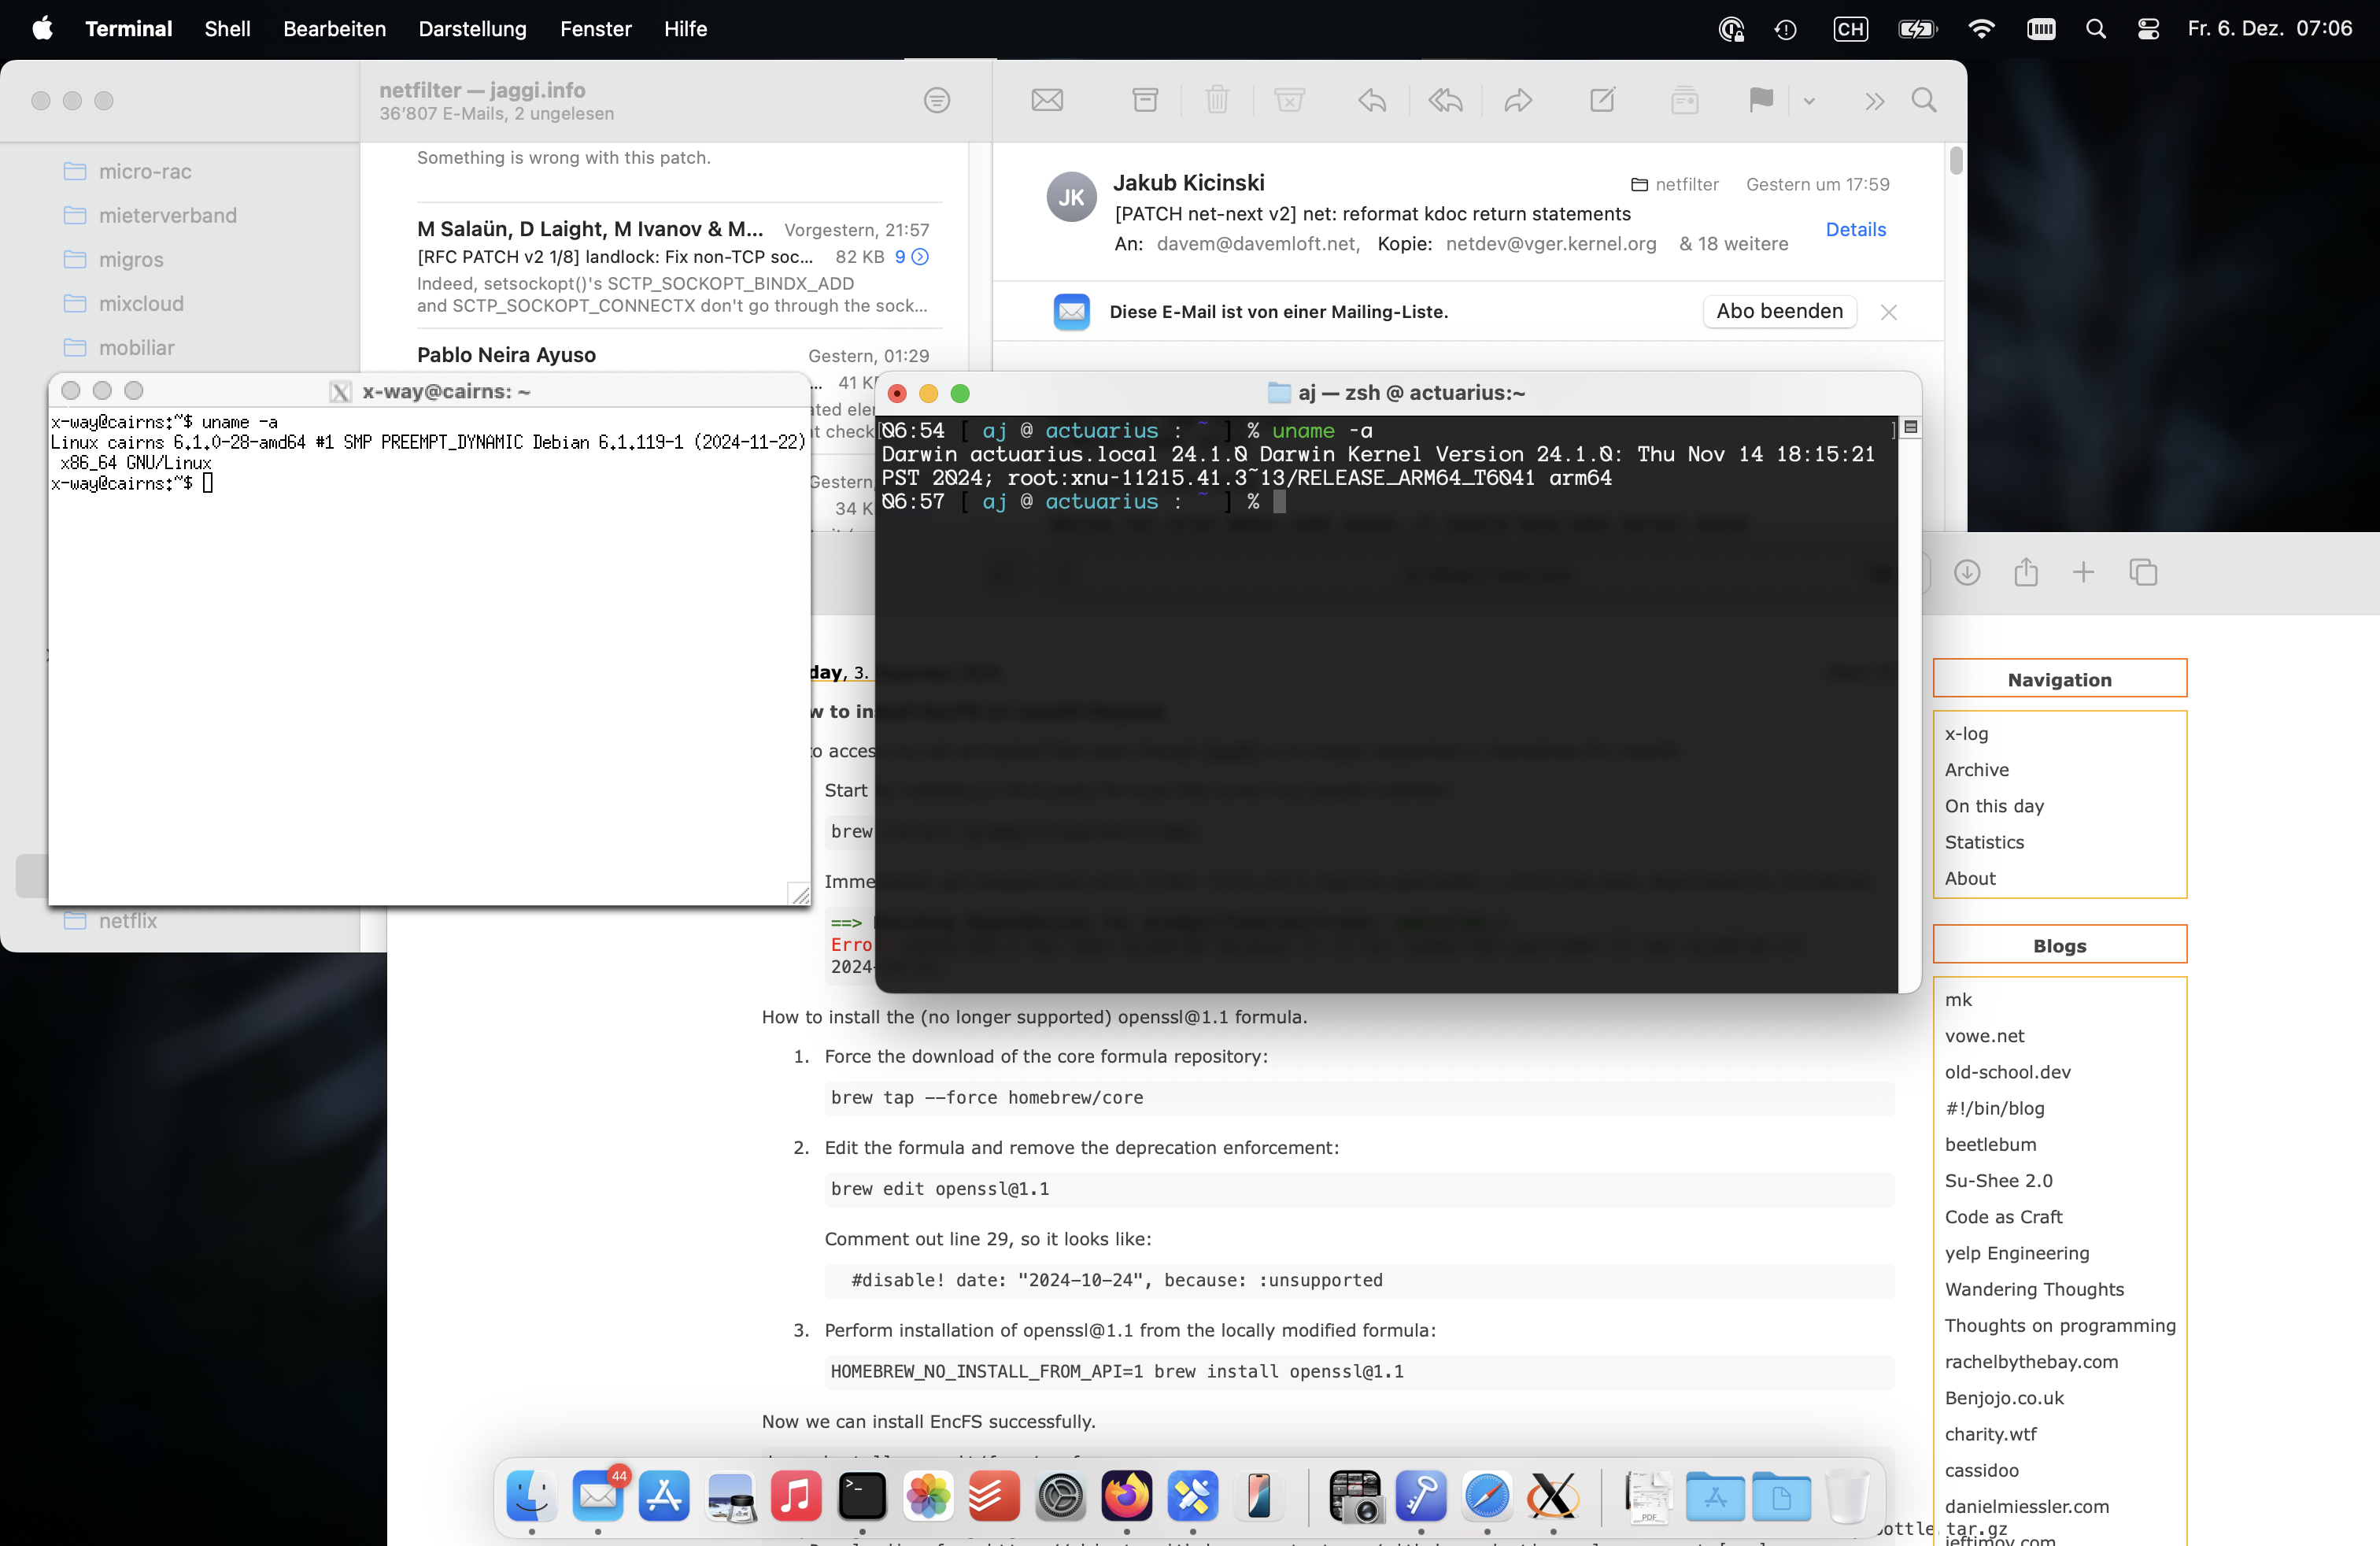
Ruben Schade published a post with answers to the terminal survey that Julia Evans recently conducted.
Inspired by this, below are my answers to these questions.
Since 2002.
zsh (on my laptop/workstation), bash (on servers).
No and yes (was using zsh before macOS made it the default).
macOS, Linux.
Terminal.app, GNOME Terminal.
Yes, vim.
Yes, my current scheme evolved from the 2003 Gentoo default scheme.
Run reset.
PATH, environment variables, alias, the prompt, custom functions, history, syntax-highlighting.
No. Tried it sporadically, but not really my thing, rather using a terminal multiplexer.
Basic local operations mostly in the GUI. Anything advanced, automated, remote or mass-operations in the terminal.
PATH, EDITOR, and some others:
% grep export zshrc/zshrc|sed -e 's/=.*//'
export GIT_AUTHOR_NAME
export GIT_COMMITTER_NAME
export TZ
export PERL5LIB
export GOPATH
export LOCKPRG
export SAM_CLI_TELEMETRY
export JAVA_HOME
export RSYNC_RSH
export CVS_RSH
export EDITOR
export USE_EDITOR
export CVSEDITOR
export BROWSER
export LESS
export HOMEBREW_NO_ANALYTICS
export WWW_BROWSER
Yes.
/ to search, then mostly spacebar to scroll and the occasional j/k.
sort, uniq, tr, sed, find with xargs to parallelise, and awk.
screen (still trying to migrate to tmux, eventually).
Scripts assuming GNU specific parameters/tools on macOS.
When connecting to an older SSH device the following 'unable to negotiate' errors occurred. They indicate that my client-side config does not allow the (old/obsolete) methods offered by the device.
Unable to negotiate with 10.222.23.2 port 22: no matching key exchange method found. Their offer: diffie-hellman-group-exchange-sha1,diffie-hellman-group1-sha1,diffie-hellman-group14-sha1
This can be fixed by enabling one of the old key exchange methods:
ssh -oKexAlgorithms=+diffie-hellman-group1-sha1 10.222.23.2
Unable to negotiate with 10.222.23.2 port 22: no matching host key type found. Their offer: ssh-rsa,ssh-dss
This can be fixed by additionally enabling one of the old host key types:
ssh -oKexAlgorithms=+diffie-hellman-group1-sha1 -oHostKeyAlgorithms=+ssh-rsa 10.222.23.2
In this article, MacKenzie builds up a config, script and systemd file to respectfully fetch an RSS feed with curl.
It uses the following as base config for curl:
fail
compressed
max-time = 30
no-progress-meter
alt-svc = alt-svc-cache.txt
etag-compare = tech.CitizenLab.rss.etag
etag-save = tech.CitizenLab.rss.etag
output = tech.CitizenLab.rss.xml
time-cond = "Tue, 05 Nov 2024 15:00:35 GMT"
write-out = "%output{tech.CitizenLab.rss.lm}%header{last-modified}"
url = "https://citizenlab.ca/feed/"
next
Then adds conditional checks for the etag-compare and time-cond directives, so they are only added if the corresponding file contains a non-empty value.
The last part is then to use a systemd Timer file with OnUnitInactiveSec=1hour, so that the command will be run one hour after the previous run finished.
The static pages of the blog here are served from a lighttpd container with an nginx proxy in front.
I was looking through the lighttpd access logs and was a bit annoyed as it showed the internal IP of the nginx proxy.
My nginx instance is already setup to forward the actual remote IP in the X-Real-IP header.
Thus I needed to make lighttpd use the forwarded IP from the header in the access logs.
This can be achieved with the extforward module using the following configuration snippet:
server.modules += ("mod_extforward")
extforward.headers = ("X-Real-IP")
extforward.forwarder = ("10.111.0.0/16" => "trust")
With this config, lighttpd uses the X-Real-IP in the access logs.
The override is only performed when the connection comes from the 10.111.0.0/16 subnet.
Which prevents remote IP spoofing via injected/faked headers.
(the 10.111.0.0/16 subnet is my internal container network where nginx is running)
The other morning I was greeted by a mailbox full of messages from failed cronjobs.
The reported error message was:
<28>Nov  7 02:51:02 ntpleapfetch[3253838]: Download from https://www.ietf.org/timezones/data/leap-seconds.list failed after 6 attempts
--2024-11-07 02:51:02--  https://www.ietf.org/timezones/data/leap-seconds.list
Resolving www.ietf.org (www.ietf.org)... 2606:4700::6810:2d63, 2606:4700::6810:2c63, 104.16.45.99, ...
Connecting to www.ietf.org (www.ietf.org)|2606:4700::6810:2d63|:443... connected.
HTTP request sent, awaiting response... 404 Not Found
2024-11-07 02:51:02 ERROR 404: Not Found.
The failing cronjobs were weekly invocations of ntpleapfetch to get the latest list of leap seconds.
After some research I found out that indeed the URL returns a 404 and that there was no newer version of the Debian package available to try.
Also the bugtracker didn't show anyone else dealing with this problem.
Thus I started looking at the source code of ntpsec
(which provides the ntpleapsec script).
I found a commit with the promising title of Fix URL used by ntpleapfetch.
This commit corrects the URL used for downloading the leap seconds list in the script.
Later I also found a corresponding message in the ntpsec users mailing list.
For my Debian systems there is no updated package with the new URL available yet.
Thus I used the following one-liner to directly fix the ntpleapfetch script.
sed -i -e 's_^LEAPSRC="https://.*"_LEAPSRC="https://data.iana.org/time-zones/tzdb/leap-seconds.list"_' /usr/sbin/ntpleapfetch
I encountered an old Debian system and tried to upgrade it from Debian 10 (buster) to Debian 12 (bookworm).
During the apt-get dist-upgrade it did run into a problem, where libcrypt.so.1 was removed and the upgrade failed to continue.
Additionally this caused that dpkg itself also stopped working and that sshd stopped accepting new connections.
Thus fixing the following error became urgent:
/usr/bin/python3: error while loading shared libraries: libcrypt.so.1: cannot open shared object file: No such file or directory
Luckily I was not the first person to run into this issue.
In a Stack Overflow answer I found the crucial workaround taken from a comment on the corresponding Debian bugreport.
The following steps allow to manually install a copy of the missing libcrypt.so files to fix the issue (when running this you might have a newer version of the package at hand, thus adjust the dpkg-deb step accordingly):
cd /tmp
apt -y download libcrypt1
dpkg-deb -x libcrypt1_1%3a4.4.33-2_amd64.deb .
cp -av lib/x86_64-linux-gnu/* /lib/x86_64-linux-gnu/
apt -y --fix-broken install
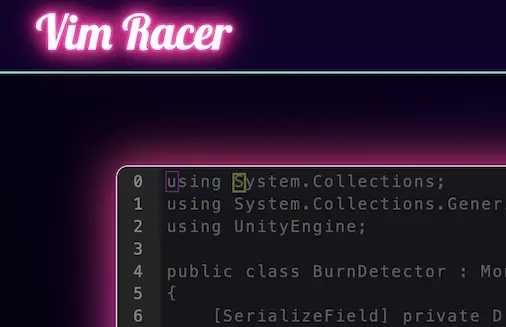
Vim Racer is a fun game to show off your vi skills 🚀
(also insightful to explore the leaderboard and see which commands were used by others)
Not seeing any emoji in Chrome on Linux?
The following fixed it for me on Debian.
sudo apt-get install fonts-noto-color-emoji
fc-cache -f -v
Afterwards restart Chrome and enjoy the colorful emoji 🥳
With Git it is possible to push only certain local commits to a remote repository.
This can be done with the following git push command, which pushes all commits up to commit to the branch remote branch in the remote repo repository:
git push <repository> <commit>:<remote branch>
For example the following pushes all except for the latest local commit to the main branch in the origin remote repo:
git push origin HEAD~1:main
The following command outputs the current time formatted according to ISO 8601 and RFC3339. It can be used for example in JSON/HTML.
date -u '+%FT%TZ'
2024-08-03T14:41:47Z
Discovered today that Puppet arrays have a built-in flatten method (which is actually provided by the underlying Ruby array).
This can make dealing with potentially nested arrays in ERB templates much easier.
The following example is from the ERB documentation:
# Peers
<% [@peers].flatten.each do |peer| -%>
peer <%= peer %>
<% end -%>
This allows for nice flexibility as @peers can now be either a single value, an array, or a nested array and all are handled in the same way without needing to write complicated if/else statements.
Let's Encrypt announced that it intends to stop supporting OCSP, which means that OCSP is basically dead now.
OCSP stapling on my server has been enabled since 2012.
With the prospect of it no longer working in the future, I've disabled it again in the nginx configuration.
	# aj, 05.11.2012, OCSP stapling (for testing see http://unmitigatedrisk.com/?p=100)
        # aj, 25.07.2024, turn it off again, as letsencrypt will disable it: https://letsencrypt.org/2024/07/23/replacing-ocsp-with-crls.html
#	ssl_stapling on;
Less: a Survival Guide is a concise post from zck.org demystifying the features of less.
My two main takeaways were:
1. Configuring less via the LESS environment variable.
The following enables markers and highlighting for search & jump actions, colored output and raw display of terminal escape sequences.
export LESS="-J -W --use-color -R"
2. Jumping to the start and end of a document with g and G.
I already used / for searching, but had always struggled to go back to the beginning of a document.
Michael W Lucas is running a Kickstarter campaign to fund writing of book providing the knowledge to run your own mail server.
As I'm running my own mail server (coincidently with some of the tools that will be discussed in the book: Debian, Postfix, Dovecot), I do sympathize with this initiative and would recommend to support the campaign.
In the Recent Docker BuildKit Features You're Missing Out On article, Martin Heinz lists some of the new features that have been added to Docker with the BuildKit introduction.
My favorite one is the debugger for failed build steps of a container:
export BUILDX_EXPERIMENTAL=1
docker buildx debug --invoke /bin/sh --on=error build .
Due to a hardware failure I had to replace one of my computers (switching from a 2015 Intel NUC to a Dell OptiPlex Micro 7010).
After moving the disk to the new system, it refused to boot (claimed that no bootable drive was available).
Turns out that the new system only supports UEFI booting and the existing disk was setup for 'legacy'/CSM boot.
I used the following steps to convert the existing disk to UEFI boot (while keeping all data on it available).
They are inspired by the excellent Switch Debian from legacy to UEFI boot mode guide from Jens Getreu.
/dev/nvme0n1 in my case)# gdisk /dev/nvme0n1 r recovery and transformation options (experts only) f load MBR and build fresh GPT from it w write table to disk and exit
# apt-get install gparted
# gparted /dev/nvme0n1Resize an existing partition to create space (does not need to be at the beginning of the disk, I used the swap partition).
fat32 and flag it bootable.EF00 for the efi partition and EF02 for the Grub2 partition):
# gdisk /dev/nvme0n1

p	print the partition table
t	change a partition's type code
t	change a partition's type code
w	write table to disk and exit
# mount -t ext4 /dev/nvme0n1p1 /mnt
# mkdir /mnt/boot/efi
# mount /dev/nvme0n1p2 /mnt/boot/efi
# mount --bind /sys /mnt/sys
# mount --bind /proc /mnt/proc
# mount --bind /dev /mnt/dev
# mount --bind /dev/pts /mnt/dev/pts
# cp /etc/resolv.conf /mnt/etc/resolv.conf
# chroot /mnt
# ls -lisa /dev/disk/by-uuidIdentify the UUID of the EFI partition (usually in the format
XXXX-XXXX) and add a corresponding line to /etc/fstab:
# echo "UUID=XXXX-XXXX /boot/efi vfat defaults 0 2" >> /etc/fstab
# apt-get remove grub-pc
# apt-get install grub-efi
# grub-install /dev/nvme0n1
# exit
# reboot
/EFI/debian/grubx64.efi) in the UEFI BIOS and make it the default :-)Needed to create a bootable Debian USB stick for some maintenance on one of my computers.
Here are the steps so I won't have to search for them the next time :-)
sudo diskutil list
sudo diskutil unmountdisk /dev/diskX
sudo dd if=./debian-live-12.5.0-amd64-standard.iso of=/dev/diskX bs=1m
In the Print HTTP Headers and Pretty-Print JSON Response post, Susam Pal shows a nice trick to pretty-print JSON output with jq from curl while also showing the HTTP response headers (using stderr):
curl -sSD /dev/stderr https://some-URL-returning-JSON | jq .
Yay! Successfully updated my Puppet Server setup from 5.3.7 to 8.4.0 🎉
It was quite a step (5.3.7 was released in January 2019) and as expected 3 major version bumps came with a couple changes.
I opted to re-create the PuppetDB and CA stores from scratch (to avoid having to migrate 5 years of data schema changes, and the CA cert is now also valid for a couple more years again).
To make the old manifests and modules work with the new versions, quite some effort was needed. This included rewriting some no longer maintained modules to use newer stdlib and concat libraries, updating a couple modules from the puppet forge (with the bonus that my puppet server runs airgapped and I had to use the download-tar-copy-extract way to install them) and fixing no longer valid syntax here and there in my custom manifests. Overall I spent about 5 hours on it (and have now a recurring reminder to update puppet more often to make this process less painful).
Helpful as usual were the resources from Vox Pupuli, in particular the Puppet Server and PuppetDB Docker images and the CRAFTY repo which contains a fully self-contained Docker Compose setup very similar to what I'm running.
Some commands that came in handy:
puppet config print ssldir --section agent
Returns the path of the TLS config folder on the client. Useful during a CA change (where you rm -rf the whole folder and then request a new TLS certificate).
puppet agent -t --noop
Dry-run the changes on the client (it does request a new TLS cert though!). Shows a nice diff of the changes it would do to files, helpful to validate that a manifest still behaves the same in the new version.
Brendan Gregg posted the following list of 'crisis tools' which you should install on your Linux servers by default (so they are available when an incident happens).
| Package | Provides | Notes |
|---|---|---|
| procps | ps(1), vmstat(8), uptime(1), top(1) | basic stats |
| util-linux | dmesg(1), lsblk(1), lscpu(1) | system log, device info |
| sysstat | iostat(1), mpstat(1), pidstat(1), sar(1) | device stats |
| iproute2 | ip(8), ss(8), nstat(8), tc(8) | preferred net tools |
| numactl | numastat(8) | NUMA stats |
| tcpdump | tcpdump(8) | Network sniffer |
| linux-tools-common linux-tools-$(uname -r) | perf(1), turbostat(8) | profiler and PMU stats |
| bpfcc-tools (bcc) | opensnoop(8), execsnoop(8), runqlat(8), softirqs(8), hardirqs(8), ext4slower(8), ext4dist(8), biotop(8), biosnoop(8), biolatency(8), tcptop(8), tcplife(8), trace(8), argdist(8), funccount(8), profile(8), etc. | canned eBPF tools[1] |
| bpftrace | bpftrace, basic versions of opensnoop(8), execsnoop(8), runqlat(8), biosnoop(8), etc. | eBPF scripting[1] |
| trace-cmd | trace-cmd(1) | Ftrace CLI |
| nicstat | nicstat(1) | net device stats |
| ethtool | ethtool(8) | net device info |
| tiptop | tiptop(1) | PMU/PMC top |
| cpuid | cpuid(1) | CPU details |
| msr-tools | rdmsr(8), wrmsr(8) | CPU digging |
ldapauth is a Node.js script which I have been using for the last 12+ years mostly unchanged.
It started its life in a LXC container, eventually was moved to a Docker container and recently ended up in its own repository on GitHub.
The functionality it provides is not extraordinary, but helped to bridge a gap where no other product was available.
It talks LDAP one one side (although limited to handle user lookup requests) and on the other side connects to a MongoDB database where the information is stored.
It emerged out of the desire to have an easy way to manage individual user accounts for my home WiFi. I already had MongoDB running for some other personal project and simply added the list of users there (including the UI for managing them).
Thus the missing part was to get the WiFi accesspoint to lookup user accounts in MongoDB.
Of course WiFi accesspoints do not directly talk MongoDB, but rather some other protocol like RADIUS.
A freeradius server was quickly setup, but still couldn't talk to MongoDB at the time. Thus comes in ldapauth, which takes LDAP queries from freeradius and turns them into MongoDB lookups so that in the end the WiFi accesspoint receives the user accounts :-)
Not sure if this is particularly useful for anyone else, but at least here it did provide good services (and continues to do so).
Current score is that it has survived three different WiFi accesspoints and has been running on 5 different servers over the time.
While adding some new alias functionality to my setup, it repeatedly failed with an error similar to this, despite my configuration changes:
Recipient address rejected: unverified address: host XXX[XXX] said: 550 5.1.1
<foo@bar.com> User doesn't exist: foo@bar.com (in reply to RCPT TO command);
Turns out that the negative verification result is cached and the cache is not reset during a reload/restart of postfix.
Thus it must be cleared manually like this:
/etc/init.d/postfix stop
rm /var/lib/postfix/verify_cache.db
/etc/init.d/postfix start
Recently named on my Debian server started to emit the following messages:
Dec 23 18:30:05 server named[1168203]: checkhints: view external_network: b.root-servers.net/A (170.247.170.2) missing from hints
Dec 23 18:30:05 server named[1168203]: checkhints: view external_network: b.root-servers.net/A (199.9.14.201) extra record in hints
Dec 23 18:30:05 server named[1168203]: checkhints: view external_network: b.root-servers.net/AAAA (2801:1b8:10::b) missing from hints
Dec 23 18:30:05 server named[1168203]: checkhints: view external_network: b.root-servers.net/AAAA (2001:500:200::b) extra record in hints
The reason for these warnings, is a IP change of the B root-server.
Debian is not ready yet with updating their dns-root-data package.
To fix the mismatching IP definitions on a Debian system, the current root zone definitions can also be updated manually from Internic:
curl https://www.internic.net/domain/named.root -s > /usr/share/dns/root.hints
curl https://www.internic.net/domain/named.root.sig -s > /usr/share/dns/root.hints.sig
To automate some of the deployment steps on my personal server, I needed a tool which can be triggered by a webhook and does execute some pre-defined commands.
A classic solution for this would be to have a simple PHP script with a call to system(...). But I don't have PHP installed on the server itself and wanted this to be more lightweight than a full Apache+PHP installation.
Thus exec-hookd was born. It is a small Go daemon which listens to HTTP POST requests and runs pre-defined commands when a matching path is requested.
Its configuration lives in a small JSON file, which lists the port to listen on and the paths together with their commands to execute:
{
  "Port": 8059,
  "HookList": [
    {
      "Path": "/myhook",
      "Exec": [
        {
          "Cmd": "/usr/bin/somecmd",
          "Args": [
            "--some",
            "arguments"
          ],
          "Timeout": "5s"
        }
      ]
    }
  ]
}
The commands are called with a timeout after which they are stopped to avoid that things hang around forever.
Found this inspiring blog post about how to use your own domain for Docker images. (via HN)
It explains how to use your own domain with redirects such that the Docker registry hosting the images can be changed easily. Your domain is only used for issueing HTTP redirects, so that the actual data storage and transfer happens directly with the Docker registry.
The blog post comes with a sample implementation for Caddy. As my server is running nginx, I used the following config snippet to achieve the same result:
server {
	listen 443 ssl;
	listen [::]:443 ssl;

	server_name	docker.x-way.org;

	access_log	/var/log/nginx/docker.x-way.org.access.log;
	error_log	/var/log/nginx/docker.x-way.org.error.log;

	ssl_certificate		/etc/letsencrypt/live/docker.x-way.org/fullchain.pem;
	ssl_certificate_key	/etc/letsencrypt/live/docker.x-way.org/privkey.pem;

	location / {
		return 403;
	}

	location = /v2 {
		add_header Cache-Control 'max-age=300, must-revalidate';
		return 307 https://registry.hub.docker.com$request_uri;
	}
	location = /v2/ {
		add_header Cache-Control 'max-age=300, must-revalidate';
		return 307 https://registry.hub.docker.com$request_uri;
	}
	location = /v2/xway {
		add_header Cache-Control 'max-age=300, must-revalidate';
		return 307 https://registry.hub.docker.com$request_uri;
	}
	location /v2/xway/ {
		add_header Cache-Control 'max-age=300, must-revalidate';
		return 307 https://registry.hub.docker.com$request_uri;
	}
}
Quickly tested it with some docker pull commands and already integrated it into the build process of dnsupd.
For a temporary log analysis task, I wanted to get the last 24h of logs from a Postfix logfile.
To achieve this I came up with the following AWK oneliner (which fails in spectacular ways around new years):
awk -F '[ :]+' 'BEGIN{m=split("Jan|Feb|Mar|Apr|May|Jun|Jul|Aug|Sep|Oct|Nov|Dec",d,"|"); for(o=1;o<=m;o++){months[d[o]]=sprintf("%02d",o)}} mktime(strftime("%Y")" "months[$1]" "sprintf("%02d",$2+1)" "$3" "$4" "$5) > systime()'
This is then used in a cronjob to get a pflogsumm summary of the last 24h:
cat /var/log/mail.log | awk -F '[ :]+' 'BEGIN{m=split("Jan|Feb|Mar|Apr|May|Jun|Jul|Aug|Sep|Oct|Nov|Dec",d,"|"); for(o=1;o<=m;o++){months[d[o]]=sprintf("%02d",o)}} mktime(strftime("%Y")" "months[$1]" "sprintf("%02d",$2+1)" "$3" "$4" "$5) > systime()' | pflogsumm

(via)
To add a new node to an existing MongoDB cluster, login to the mongo shell on the primary node and run the following command:
rs.add({host:"mongodb3.example.net:27017"})
Similar to remove a node from the cluster, use:
rs.remove("mongodb3.example.net:27017")
The default configuration of snmpd on Debian has debug level logging enabled and thus we end up with a constant flood of these messages in /var/log/syslog
snmpd[19784]: error on subcontainer 'ia_addr' insert (-1)
The fix is to lower the logging level, which can be accomplished like this on systems with systemd:
cp /lib/systemd/system/snmpd.service /etc/systemd/system/snmpd.service
sed -i 's/Lsd/LS6d/' /etc/systemd/system/snmpd.service
systemctl daemon-reload
systemctl restart snmpd
On systems without systemd, the logging level is set by the init script (unless explicitly configured in /etc/default/snmpd), and can be changed like this:
sed -i 's/Lsd/LS6d/g' /etc/default/snmpd
sed -i 's/Lsd/LS6d/g' /etc/init.d/snmpd
service snmpd restart
Recently the disk holding the root (/) filesystem on one of my linux systems started to report increased SMART raw read error rates, seek error rates and ECC recovered hardware errors.
As these are early indications of a failing disk, it became time to replace the disk.
Normally replacing a disk comes down to plugging in the new one, coyping over the data, umount the old disk, mount the new one in place, unplug the old disk.
But when it is the disk with the root filesystem a couple extra steps are needed.
The steps below worked for my Debian system without problems (even used the opportunity to upgrade to an SSD :-)
(source is this thread on StackExchange)
The following makes some assumptions:
- All commands ran as root when possible
- You are on a physical console to the host (need to type in grub commands to boot up the new disk!)
- You want an ext4 files system
- You are loosely familiar on a basic level with all commands run
- You are NOT booting from a RAID device
So here we go.
- Physically install new disk into computer and connect to available port leaving old disk in existing position.
- Boot computer into old OS.
- Prepare and mount new disk; first identify new disk
fdisk -l- Partition new disk
fdisk /dev/(newdisk)
Make partition primary partition with type "83" file system type.- Create filesystem
mkfs.ext4 /dev/(newpartition)- Mount new filesystem
mkdir /mnt/(newpartitionmountpoint)
mount /dev/(newpartition) /mnt/(newpartitionmountpoint)- Copy disk:
/sbin/init 1 (drop to single user mode)
rsync -avxHAX / /mnt/(newpartitionmountpoint)- Update FSTAB on newdisk
blkid (note UUID of new partition)
vi /mnt/(newpartitionmountpoint)/etc/fstab
Replace existing UUID of / in FSTAB to new disk UUID- Configure grub and install to new disk boot loader:
grub-mkconfig
update-grub
grub-install /dev/(newdisk)- Copy grub.cfg from old disk to new
cp -ax /boot/grub/grub.cfg /mnt/(newpartitionmountpoint)/boot/grub/grub.cfg- Open grub.cfg on new disk and replace all UUIDs with new disk
vi /mnt/(newpartitionmountpoint)/boot/grub/grub.cfg
Replace all old UUIDs with the UUID of the new disk- Shut down computer
shutdown- Physically move the new drive to the 1st drive location and remove old drive
- Start computer and grub should present:
error: no such device: xxxxxxxx-xxxx-xxxx-xxxx-xxxxxxxxxxxx GRUB rescue>- Manually boot new OS from grub; first identify the drive and partition of the boot files
ls [to identify your drive and partition options]
ls (hdx,p)/ [to identify which partition has the /boot folder]- Then, you can load the boot menu manually from the drive and partition you found above. Typically this would be (hd0,msdos1).
set prefix="(hdx,p)/boot/grub"
set root="(hdx,p)"
insmod normal
normal- Login to OS on new drive
- Configure grub again
fdisk -l (note dev of newdisk)
grub-mkconfig
update-grub
grub-install /dev/newdiskAnd that should be it!
On my Linux hosts I'm running rkhunter. On a newly configured host it lately reported the following warning:
Warning: The SSH and rkhunter configuration options should be the same:
        SSH configuration option 'PermitRootLogin': no
	Rkhunter configuration option 'ALLOW_SSH_ROOT_USER': no
On first sight the warning does not seem to make much sense, as both configuration options seem to be set to the same value (no).
But digging further reveals that they are stored slightly different:
# file /etc/rkhunter.conf
/etc/rkhunter.conf: ASCII text
# file /etc/ssh/sshd_config
/etc/ssh/sshd_config: ASCII text, with CRLF line terminators
Turns out that rkhunter is also checking the line terminators as part of the configuration values, and warns because they are different.
Knowing this, the fix is simple: run dos2unix on the CRLF file
Sometimes you need to be notified about reboots of a machine without having the luxury of a proper monitoring system.
The following crontab entry triggers an e-mail when the host has been rebooted in the last 5 minutes.
*/5 * * * * [ $(sed -e 's/\..*//' /proc/uptime) -lt 540 ] && echo "Host has been rebooted! Uptime: $(uptime)"
Postfix provides the reject_unknown_sender_domain check which allows to only accept incoming e-mails sent from domains which actually exist.
Unfortunately there exists this one external service which uses a non-existing subdomain to send their notification e-mails. Thus all their notifications get rejected.
The following configuration allows to keep the reject_unknown_sender_domain check in place, but to exclude a specific domain from this check.
# snippet in main.cf
smtpd_sender_restrictions = check_sender_access pcre:/etc/postfix/sender_domain_verification
# exclude regex in sender_domain_verification
!/@domain\.to\.exclude\.com$/ reject_unknown_sender_domain
Your distribution might ship Postfix support for pcre matches in a dedicated package which needs to be installed separately (in the case of Debian you need to install the postfix-pcre package).
I've just added the indexcolor patch to my Mutt 1.5.24 Homebrew Formula.
To use this Formula just type brew tap x-way/mutt followed by brew install x-way/mutt/mutt --with-trash-patch --with-indexcolor-patch to install Mutt 1.5.24 with trash_folder and indexcolor support.
At work I'm a quite avid user of Mutt. Unfortunately the upgrade to the recently released version 1.5.24 did not go over as smooth as expected.
I'm using Homebrew to install Mutt on Mac OS X, and even though there is an updated version in the official Homebrew repository, it no longer comes with the trash_folder patch (it fails to apply against the 1.5.24 source tree and was thus removed).
In order to build the new Mutt version with the trash_folder support, I updated the patch for version 1.5.24: mutt-1.5.24-trash_folder.diff.
The official Homebrew repository prefers unpatched packages and encourages the creation of independent "Taps" (package repositories) for patched packages. Thus I also created my own Homebrew Tap which contains the 1.5.24 version of Mutt with the updated trash_folder patch: x-way/homebrew-mutt.
To use this Tap just type brew tap x-way/mutt followed by brew install x-way/mutt/mutt --with-trash-patch to install Mutt 1.5.24 with trash_folder support. Cheers!
The Quagga version in Debian 8 (v0.99.23.1) suffers from a bug in ospf6d, which causes that no IPv6 routes are exchanged via point-to-point interfaces.
In order to workaround this problem (and re-establish IPv6 connectivity), a downgrade of the quagga package can be done.
For this we add the 'oldstable' entry to sources.list and pin the quagga package to the old version.
Entry to add to /etc/apt/sources.list:
deb http://mirror.switch.ch/ftp/mirror/debian/ oldstable main
Entry to add to /etc/apt/preferences:
Package: quagga
Pin: version 0.99.22.*
Pin-Priority: 1001
After the entries have been added, run apt-get update followed by apt-get install quagga to downgrade to the old quagga package.
To avoid the automatic installation/switch to systemd during the upgrade to Debian 8, it is enough to prevent the installation of the systemd-sysv package.
This can be done by creating a file /etc/apt/preferences.d/no-systemd-sysv with the following content:
Package: systemd-sysv
Pin: release o=Debian
Pin-Priority: -1
(via)
The UNIX System: Making Computers More Productive, 1982, Bell Laboratories
Before sending a CSR off to your CA, it is worth checking that all parameters are correct.
Especially you should make sure that the requested signature algorithm is SHA256 and not the deprecated SHA1.
This can be done with the following OpenSSL command:
openssl req -noout -text -in <your_CSR_file>
guest# poweroff
newmachine# lvcreate -L 120G -n myguest myvolgroup
oldmachine# dd if=/dev/vg_foo/lv_bar | ssh newmachine dd of=/dev/volgroup/myguest
newmachine# /etc/init.d/libvirt-bin reload
newmachine# virsh start myguest
e2fsck -f /dev/vg_foo/lv_bar
resize2fs /dev/vg_foo/lv_bar 180G
lvreduce -L 190G /dev/vg_foo/lv_bar
resize2fs /dev/vg_foo/lv_bar
e2fsck -f /dev/vg_foo/lv_bar
Found this neat trick in Brendan Gregg's Blazing Performance with Flame Graphs talk.
Switching to LANG=C improved performance by 2000x
In a quick test I directly got a performance gain of factor 50.22.
This is quite an achievement for only changing one environment variable.
real:~# du -sh /var/log/querylog
148M	/var/log/querylog
real:~# time grep -i e /var/log/querylog > /dev/null

real	0m12.807s
user	0m12.437s
sys	0m0.068s
real:~# time LANG=C grep -i e /var/log/querylog > /dev/null

real	0m0.255s
user	0m0.196s
sys	0m0.052s
I suspect that the performance gain may vary quite a lot depending on the search pattern. Also, please note that this trick only works when you know that the involved files and search patterns are ASCII only.
(via Standalone Sysadmin)
For a long time it annoyed me every time that less only showed ASCII codes instead of colors when piping some 'color-enabled' output into it.
Turns out there is an easy fix for that:
colordiff a/foo b/foo | less -R
Thanks to Major Hayden for this very useful tip!
openssl gendh -out dh4096.pem 4096
The HAVP blacklist script chocked on some entries from PhishTank. These issues have been fixed with some more sed magic and I've put and updated version of the script on Github.
When working with virtualization technologies like KVM on Debian, you might need to configure bridge interfaces which are not attached to a physical interfaces (for example for a non-routed management network or similar).
Debian uses the directive bridge_ports in /etc/network/interfaces to indicate whether an interface is a bridge interface or not.
The syntax checker does not accept an empty bridge_ports directive since he expects a list of physical interfaces to attach to the bridge interface.
When needing a bridge interface without any physical interfaces attached, usually people configure this interface by hand or with a special script.
Since I manage /etc/network/interfaces with my Puppet module, I would like to use it to configure all network interfaces including the unattached bridge interfaces.
It turns out that this can be done by passing none as parameter for the bridge_ports directive like this:
interface br0 inet static
	address 192.0.2.1
	netmask 255.255.255.0
	bridge_ports none
Since the default templates of HAVP look like being stuck in the 90's, I created some nice-looking templates.
You can download them from GitHub: https://github.com/x-way/havp-templates
Currently there is only the german version, feel free to send me a pull-request with another translation :-)
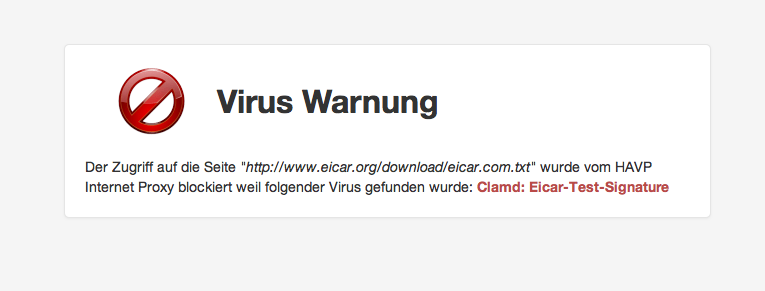
For basic virus protection I'm running a proxy with HAVP and ClamAV.
Since some time I was using HAVPs blacklist functionality to block Ads (by blacklisting *.doubleclick.net and *.ivwbox.de).
As such a manual blacklist is not very efficient I wanted to have an auto-updating list of adservers, thus I started to write the shellscript below which generates an up-to-date blacklist based on the adserverlist from pgl.yoyo.org.
Shortly after this I extended the script to also incorporate a Phising blacklist based on the data from PhishTank.
Currently I'm using the version below which runs in a cronjob every two hours and keeps the HAVP blacklist up-to-date. Please note that you need to insert your own free PhishTank API key when using this script.
#!/bin/sh

cd /etc/havp

OUTFILE=/etc/havp/blacklist

ADSERVERLIST=/etc/havp/adserverlist
PHISHTANK=/etc/havp/phishtank
MYBLACKLIST=/etc/havp/myblacklist

wget -q -N "http://pgl.yoyo.org/adservers/serverlist.php?hostformat=webwasher;showintro=0;mimetype=plaintext"
sed -e 's_^//_#_g' serverlist.php* | sort | uniq > $ADSERVERLIST

wget -q -N http://data.phishtank.com/data/<PhishTank API key>/online-valid.csv.bz2
bzcat online-valid.csv.bz2 | sed \
	-e 's/^[0-9]*,//' \
	-e 's@,http://www.phishtank.com/phish_detail.php?phish_id=[0-9]*,.*$@@' \
	-e 's/^"\(.*\)"$/\1/'  \
	-e 's_^https\?://__' \
	-e 's_/$_/*_' \
	-e 's_^\([^/]*\)$_\1/*_' \
	-e 's/?.*/*/' | \
grep -vF 'phish_id,url,phish_detail_url,submission_time,verified,verification_time,online,target' | \
iconv -f utf8 -t ascii -c - | sort | uniq > $PHISHTANK


echo "# blacklist file generated by $0, `date`" > $OUTFILE

echo "\n# MYBLACKLIST:" >> $OUTFILE
cat $MYBLACKLIST >> $OUTFILE

echo "\n# ADSERVERLIST:" >> $OUTFILE
cat $ADSERVERLIST >> $OUTFILE

echo "\n# PHISHTANK:" >> $OUTFILE
cat $PHISHTANK >> $OUTFILE
Thanks to the ngx_echo module, it is trivially easy to build a clone of the icanhazip.com service with nginx:
server {
	listen 80;
	listen [::]:80;

	location / {
		echo $remote_addr;
	}
}
While playing around with my Puppet configuration I discovered that the 'system facts' returned by the Facter helper tool were not consistent on my Debian boxes.
On some machines Facter properly reported all LSB related facts of the system, while on other machines it did not report any such information.
The problem occurred on about 50% of the hosts, so I excluded a bug introduced by manual over-tuning of the system configuration.
Further investigation showed that Facter uses the lsb_release command to collect the LSB information of the system.
On Debian this command is provided by the lsb-release package which was only installed on half of my systems...
Now my Puppet manifests include the following configuration directive which should prevent this problem in the future :-)
package { 'lsb-release':
	ensure => installed,
}
Quick and dirty way to get an alert before your server starts to go crazy because of a full disk.
This script checks if a disk is more than 75% full.
#!/bin/bash

df -h | awk '/%/ {
        limit = 75
        percent = sprintf("%d",$5)
        if ( percent > limit ) {
                print "Warning: ",$6," (",$1,") is to ",percent,"% full:"
                print $0
        }
}'
Save it under /root/check_disk_usage.sh and create the following crontab entry to check the disk usage every day at half past midnight.
30 0 * * * /root/check_disk_usage.sh
Assuming your host has configured an MTA and defined a recipient for root@<yourhost>, you should get an e-mail whenever a disk is more than 75% full.
To process all **frozen** messages in the Exim queue use this command:
mailq | grep frozen | awk '{print $3}' | xargs exim -v -M
To whipe the Exim message queue use the following command:
exim -bp | exiqgrep -i | xargs exim -Mrm
Adding the following line to the Exim4 configuration prevents that all the disk space is used up by the messages in the spool folder:
check_spool_space=100M
This refuses incoming messages with a "452 Space shortage, please try later" message when less than 100 megabytes of disk space are available on the partition where the spool folder resides.
sudo apt-get install kaffeine dvb-utils mercurial linux-headers-$(uname -r) build-essentialhg clone http://linuxtv.org/hg/v4l-dvbcd v4l-dvbsudo makesudo make installIf you're using another flavor of Linux or Ubuntu you may be missing the firmware file, you can get it here.

XSel gives easy commandline access to the X11 clipboard (primary & secondary).
Unix Toolbox, a nice collection of Unix/Linux/BSD commands, may be useful for advanced users.
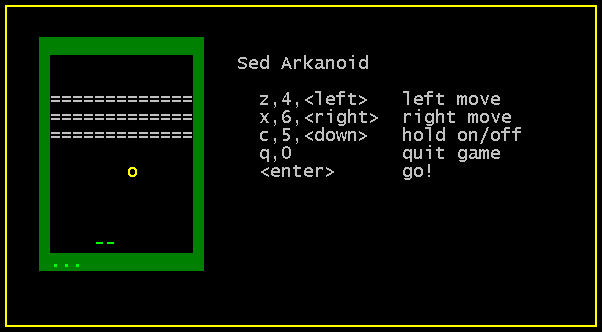
Instead of learning for the exams, I mess around with strange things:
arkanoid.sed is a breakout-game written entirely in sed. Download the sed-file and use sed -f arkanoid.sed to start the game. (via)
NameVirtualHost *:443
NameVirtualHost *:80

<VirtualHost *:80>
	ServerName example.org
	RewriteEngine on
	RewriteRule ^(.*)$ https://%{SERVER_NAME}$1 [L,R]
</VirtualHost>

<VirtualHost *:443>
	ServerName example.org
	DocumentRoot /var/www/example.org
	...
</VirtualHost>
Thanks to this (really simple) tutorial from debian-administration.org I managed to enable SSL on my server. Thus links.x-way.org is available via HTTPS.
If you run a server without SSL, please take two minutes and enable it.
Your users will be thankfull for their protected privacy.
Today I finally installed a mail transfer agent/mail delivery agent on my server.
I quickly looked at the most popular applications for such a job (Exim, Postfix and qmail) and choosed Exim 4 (especially because it's the only one which is 'real' opensource).
Then I searched a Howto or tutorial on Google, but most results were not really useful. For example the Exim 4 Howto from debianhowto.de like many others disappointed me a bit since they don't give any advice on configuring Exim. But after some evolution and mutation of the search string I finally found a very good guide.
Configuring Exim4 and Courier IMAP under Debian GNU/Linux from Jason Boxman helped me to set up Exim step by step. Not also he explains how to install Exim but he also shows how to interact with Courier IMAP and how to secure all transfers with SSL.
I can only recommend you this guide if you want to install Exim 4 on a Debian system.
Linux wurde erfolgreich auf dem Intel-iMac gebootet! :-)
Mit Hilfe des EFI Linux Bootloaders elilo, eines modifizierten Kernels und eines gehackten Vesa-Framebuffer Treibers ist es dem Xbox-Linux Entwickler Edgar Hucek aka gimli gelungen den Linux Kernel und anschliessend auch Gentoo Linux auf einem 17-Zoll iMac mit Intel Core Duo Prozessor zum Laufen zu bringen.
Im Mactel-Linux Wiki finden sich schon ein paar Screenshots sowie die Ausgaben von dmesg und lspci.
Momentan konnte die graphische Oberfläche (aka X) noch nicht zum Starten gebracht werden. Anhand der Zeile
01:00.0 VGA compatible controller: ATI Technologies Inc Unknown device 71c5
in der Ausgabe von lspci vermute ich, dass die ATI Graphikkarte nicht erkannt/unterstützt wird und deshalb X noch nicht gestartet werden kann. Aber wie vom Entwickler gesagt, ist Mactel-Linux vorerst nur ein grosser Hack, und es wird noch etwas Zeit benötigen bis Linux stabil auf den Intel Macs läuft.
Bei der Namenswahl hätten sich die Entwickler von mir aus lieber etwas anderes einfallen lassen können. 'Mactel' assoziere ich mit Telefon und nicht mit Computer. Aber daran werde ich mich wohl gewöhnen müssen, genauso wie an das unmögliche 'MacBook Pro'.
via symlink.ch
Update 18.02.06:
Mittlerweile existiert auch ein HOWTO und eine Memory Map des EFI. Der gehackte Vesa-Framebuffer Treiber funktioniert bis jetzt aber ausschliesslich mit dem 17-Zoll iMac.
Da gerade mein Kernel "geupdatet" wird, habe ich den Patch zur Unterstützung der PowerBook Buttons an die aktuelle Kernelversion angepasst.
Bei dieser Gelegenheit habe ich den neuen Patch an ein paar Kernelentwickler geschickt, vielleicht schafft er's diesmal bis in den "offiziellen" Kernel.
Update:
Der Patch hat's bis zu Linus geschafft ([PATCH] macintosh/adbhid.c: adb buttons support for aluminium PowerBook G4), wird also in der nächsten Kernelversion dabei sein :-)
")
Heute habe ich beim Einkaufen diese 'Webcam' entdeckt. Für 29.90 CHF (~20€) bietet sie bis zu 30 640×480 Pixel grosse Bilder pro Sekunde. Mit dabei eine CD mit Treiber für Windows 98 bis XP.
Als ich sie an mein Linux-PowerBook anschloss sagte mir dmesg nur gerade diese zwei Zeilen:
ohci_hcd 0001:01:1b.0: remote wakeup
usb 3-1: new full speed USB device using address 2
Von usbview wurde die Webcam auch nicht erkannt. Also super Voraussetzungen für einen Betrieb mit Linux.
Nach etwas googeln fand ich spca50x.sf.net und das entsprechende 2.6er-Kernerlmodul. Erfreulicherweise ist das auch im Portage-Tree von Gentoo. Also schnell ein emerge spca5xx. Ein modprobe spca5xx
lässt einige Fehlermeldungen erscheinen (Unresolved Symbols). Abhilfe
schafft das Aktivieren der Video for Linux Unterstützung im Kernel.
Nach make, make modules und make modules_install
lädt das spca5xx Modul problemlos (eigentlich sollte man nach einem
Neukompilieren des Kernels auch den neuen Kernel laden und nicht nur
die neuen Module!).
Ein chmod a+rx /dev/video0 als root behebt Berechtigunsprobleme, welche beim Zugriff als normaler Benutzer auftreten können.
Fazit:
Von Vim ist Version 6.3 erschienen.
Via theflow
Seit ein paar Monaten, benutze ich GnuCash um mein "Vermögen" zu verwalten.
GnuCash wurde in erster Linie für Privatanwender und KMUs entwickelt und bringt entsprechende Features mit:
Wie ich nach einem Update erfreut festgestellt habe, kann Dillo jetzt auch mit Tabs umgehen.

Momentan machen wir im Programmieren ein Projekt in Zweierteams. Um die ganze Codehandhabung zu vereinfachen, hat sich unser Team entschieden, CVS einzusetzen. CVS bietet eine zentrale Codeverwaltung mit Versions- und Konfliktsmanagement.
Da ich als CVS-Neuling das CLI-Interface nur grundlegend kenne, habe ich mich nach einem GUI-Interface umgeschaut. Dabei habe ich zwei überzeugende Programme gefunden: TkCVS und LinCVS, das auch auf Windows portiert wurde.
#!/usr/bin/perl
#
# 2003 by x-way - http://waterwave.ch/weblog
#
# Add this to your menu, if you have pekwm's dynamic menu support:
#
# SubMenu = "Backgrounds" {
#   Entry { Actions = "Dynamic /path/to/this/file /path/to/your/wallpapers" }
# }
#

use warnings "all";
use strict;

if($ARGV[0] eq '-set') {
        my $wallpaper = $ARGV[1];

        open(PKCONF, "<$ENV{HOME}/.pekwm/start") or die "Can't open ~/.pekwm/start";
        my @file = <PKCONF>;
        close(PKCONF);

        my @file2 = ();
        my $set = '';

        foreach (@file) {
                s/^xsetbg -center ".*"/xsetbg -center "$wallpaper"/gi;
                push(@file2, $_);

                if(index($_, 'xsetbg -center') == 0) {
                        $set = $_;
                }
        };

        if($set eq "") {
                push(@file2, "xsetbg -center \"".$wallpaper."\"");
        }

        open(PKCONF, ">$ENV{HOME}/.pekwm/start") or die "Can't write ~/.pekwm/start";
        print(PKCONF @file2);
        close(PKCONF);
} else {

        print("Dynamic {\n");

        for(my $i = 0; $i < scalar(@ARGV); $i++) {
                my $dir = $ARGV[$i];

                opendir(DIR, "$dir") || die "Can't opendir $dir: $!";
                my @backgrounds = grep { (! /^\./) } readdir(DIR);
                closedir DIR;

                foreach my $x (@backgrounds) {
                        my $y = $x;
                        $y =~ s+.*/++g;

                        if(! -d "$dir/$x") {
                                $y =~ s/\.[^\.]*$//g;
                                $y =~ s/(_|-)[0-9]{3,4}(x[0-9]{3,4}|)//g;
                                $y =~ s/_/ /g;
                                $y =~ s/%20/ /g;
                                print("Entry = \"$y\" { Actions = \"Exec xsetbg -center \\\"$dir/$x\\\" && $0 -set \\\"$dir/$x\\\" \" }\n");
                        } else {
                                print("Submenu = \"$y\" {\nEntry { Actions = \"Dynamic $0 \\\"$dir/$x\\\" \" }\n}");
                        }
                }
        }

        print("}\n");
}

aterm -tr -sh 75 -rv +sb -tint blue- Farbiger Prompt
PS1='\[\033[1;30m\][ \[\033[01;32m\]\u\[\033[0;37m\] @ \[\033[01;32m\]\h \[\033[0;37m\]: \[\033[01;34m\]\w\[\033[1;30m\] ] \[\033[0;37m\]\$ \[\033[01;00m\]'- Farbiges ls
alias ls="ls --color=auto"- Farbtabelle für die Shell: colors
PROMPT_COMMAND='echo -ne "\033]2;$USER@$HOSTNAME: $PWD ($_)\007"'

Dieses Shellscript macht ein tar-file mit den Dateien aus /home, /www und /root, die seit dem letzten Backup verändert wurden und legt dieses unter /backup ab inklusive einer Inhaltsangabe :-)today=`date +%d%b%Y` backup_path=/backup tar -cvf $backup_path/backup_$today.tar `find /home /www /root -newer $backup_path ! -name *~ ! -type d -print` > $backup_path/backup_$today.toc
su
root-passwort
cat /dev/mouse > /dev/Pfad zum Drucker
emerge -u worlddie installierten Programme aktualisiert werden.
mke2fs -j /dev/hda6und diesem Eintrag in /etc/fstab
/dev/hda6 /usr/local/games ext3 noatime,user 0 0wiederbelebt ;-)
!!! ERROR: The ebuild did not complete successfully.
!!! Function src_compile, Line 12, Exitcode 2
!!! (no error message)
Kann mir mal einer sagen, weshalb das nicht gehen will, wo ich doch die aktuellen Sourcen habe.
emerge synchat auch nichts geholfen.
/dev/hda1  ntfs    w2k-system
/dev/hda5  ntfs    w2k-programme
/dev/hda6  fat32   w2k-games
/dev/hda7  fat32   www
/dev/hda8  ext2/3  /boot gentoo
/dev/hda9  ext2/3  /     debian
/dev/hda10 ext2/3  /usr  debian
/dev/hda11 ext2/3  /var  debian
/dev/hda12 ext2/3  /tmp  debian
/dev/hda13 ext2/3  /     gentoo
/dev/hda14 ext2/3  /home
/dev/hda15 swap    swap
/dev/hda16 fat32   backup www
/dev/hda17 fat32   backup eigene dateien
/dev/hda18 fat32   eigene dateien
/dev/hda19 fat32   media
bash: make: command not found

 | Beim nächsten (grösseren) Distributions wechsel, werde ich nicht mehr mühsam selbst herunterladen sondern hier eine fertige CD bestellen. Dabei muss ich mir unbedingt dieses "Kreditkarten-Debian" zulegen ;-) |