Updated HAVP blacklist script
The HAVP blacklist script chocked on some entries from PhishTank. These issues have been fixed with some more sed magic and I've put and updated version of the script on Github.
The HAVP blacklist script chocked on some entries from PhishTank. These issues have been fixed with some more sed magic and I've put and updated version of the script on Github.
When setting up a new BGP peering, you may want to test if your peering partner uses the correct MD5 password without bringing up your side of the session.
For this the tcpdump option -M can be used to supply the MD5 password when sniffing the traffic of the new peer:
tcpdump -ni eth0 -M MyBgPMd5PaSsWoRd tcp port 179
tcpdump will then verify the MD5 signature for every packet where it finds a MD5 signature TCP option as specified in RFC2385.
In the output you will see md5valid for packets where your password matches the MD5 signature or md5invalid for packets where your password does not match the MD5 signature.
If you see neither md5valid nor md5invalid then the peer did not configure any MD5 BGP password.
If you want to check for mismatching MD5 passwords after you bring up the BGP session, just look into the kernel log. Linux reports invalid MD5 TCP signatures like this:
MD5 Hash failed for (1.2.3.4, 56789)->(1.2.3.5, 179)
When working with virtualization technologies like KVM on Debian, you might need to configure bridge interfaces which are not attached to a physical interfaces (for example for a non-routed management network or similar).
Debian uses the directive bridge_ports in /etc/network/interfaces to indicate whether an interface is a bridge interface or not.
The syntax checker does not accept an empty bridge_ports directive since he expects a list of physical interfaces to attach to the bridge interface.
When needing a bridge interface without any physical interfaces attached, usually people configure this interface by hand or with a special script.
Since I manage /etc/network/interfaces with my Puppet module, I would like to use it to configure all network interfaces including the unattached bridge interfaces.
It turns out that this can be done by passing none as parameter for the bridge_ports directive like this:
interface br0 inet static
	address 192.0.2.1
	netmask 255.255.255.0
	bridge_ports none
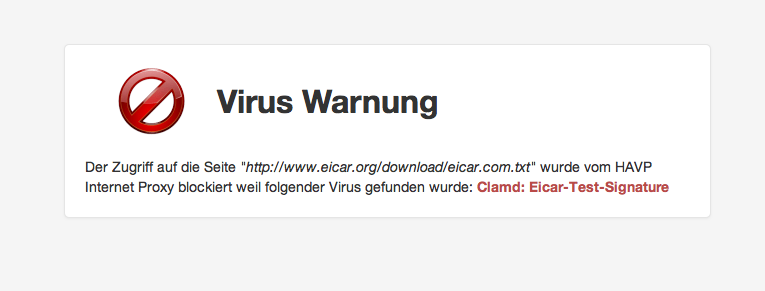
Since the default templates of HAVP look like being stuck in the 90's, I created some nice-looking templates.
You can download them from GitHub: https://github.com/x-way/havp-templates
Currently there is only the german version, feel free to send me a pull-request with another translation :-)
For basic virus protection I'm running a proxy with HAVP and ClamAV.
Since some time I was using HAVPs blacklist functionality to block Ads (by blacklisting *.doubleclick.net and *.ivwbox.de).
As such a manual blacklist is not very efficient I wanted to have an auto-updating list of adservers, thus I started to write the shellscript below which generates an up-to-date blacklist based on the adserverlist from pgl.yoyo.org.
Shortly after this I extended the script to also incorporate a Phising blacklist based on the data from PhishTank.
Currently I'm using the version below which runs in a cronjob every two hours and keeps the HAVP blacklist up-to-date. Please note that you need to insert your own free PhishTank API key when using this script.
#!/bin/sh

cd /etc/havp

OUTFILE=/etc/havp/blacklist

ADSERVERLIST=/etc/havp/adserverlist
PHISHTANK=/etc/havp/phishtank
MYBLACKLIST=/etc/havp/myblacklist

wget -q -N "http://pgl.yoyo.org/adservers/serverlist.php?hostformat=webwasher;showintro=0;mimetype=plaintext"
sed -e 's_^//_#_g' serverlist.php* | sort | uniq > $ADSERVERLIST

wget -q -N http://data.phishtank.com/data/<PhishTank API key>/online-valid.csv.bz2
bzcat online-valid.csv.bz2 | sed \
	-e 's/^[0-9]*,//' \
	-e 's@,http://www.phishtank.com/phish_detail.php?phish_id=[0-9]*,.*$@@' \
	-e 's/^"\(.*\)"$/\1/'  \
	-e 's_^https\?://__' \
	-e 's_/$_/*_' \
	-e 's_^\([^/]*\)$_\1/*_' \
	-e 's/?.*/*/' | \
grep -vF 'phish_id,url,phish_detail_url,submission_time,verified,verification_time,online,target' | \
iconv -f utf8 -t ascii -c - | sort | uniq > $PHISHTANK


echo "# blacklist file generated by $0, `date`" > $OUTFILE

echo "\n# MYBLACKLIST:" >> $OUTFILE
cat $MYBLACKLIST >> $OUTFILE

echo "\n# ADSERVERLIST:" >> $OUTFILE
cat $ADSERVERLIST >> $OUTFILE

echo "\n# PHISHTANK:" >> $OUTFILE
cat $PHISHTANK >> $OUTFILE
To avoid the timeconsuming manual configuration of a proxy server on all computers, phones and tablets, the proxy configuration can be provided automatically via DHCP by using WPAD.
For this setup, the following components are needed:
On a MikroTik system, the DHCP server configuration looks like this:
/ip dhcp-server option
add code=252 name=local-pac-server value="http://192.168.0.2:80/wpad.dat\?"
/ip dhcp-server network
add address=192.168.0.0/24 dhcp-option=local-pac-server dns-server=192.168.0.1 gateway=192.168.0.1 netmask=24
Please note the trailing questionmark in the URL for the PAC file. This is a workaround for yet another occurrence of RFC nitpicking where some implementations might misinterpret the DHCP option and add an encoded NULL-byte character to the end of the URL when requesting the PAC file from the webserver.
With the questinmark at the end of the URL, any additional trailing NULL-byte character will be ignored by the webserver and the PAC file will be loaded just fine.
Following the example above, on the machine 192.168.0.2, we serve the following wpad.dat file:
function FindProxyForURL ( url, host ) {
	return "PROXY 1.2.3.4:8080; DIRECT";
}
With this setup, all systems will use the proxy at 1.2.3.4 and if the proxy is not available try to connect directly to the Internet.
While this is fine for a home network where the proxy is mostly used for adblocking, you probably want to remove the DIRECT part in an enterprise setup.

Thanks to the ngx_echo module, it is trivially easy to build a clone of the icanhazip.com service with nginx:
server {
	listen 80;
	listen [::]:80;

	location / {
		echo $remote_addr;
	}
}
The Cisco WAP121 runs a Linux based firmware. This is how you get a Rootshell on it:
sh
This probably works with the Cisco WAP321 as well (I only tested with the WAP121).
Also when having still only the one 'cisco' user account configured you can directly get a Rootshell via SSH like this: ssh -l root@<WAP121 IP>
After the summer festivals of Sydney, now also the festivals in Switzerland start again.
First one this year: Artiphys 2012